
Learn how to supercharge your Mac terminal with Warp and Oh My Zsh. This step-by-step guide helps developers boost productivity with auto-suggestions, themes, and AI features.
If you're like me, one of the first things you do on a new Mac is customize your terminal. I've tried dozens of setups over the years, but nothing has stuck quite like the combination of Warp Terminal and Oh My Zsh.
Why this particular combo? Warp is a blazingly fast, modern terminal that feels like it was designed by people who actually use terminals daily. Meanwhile, Oh My Zsh transforms the standard command line into something that's not just functional but actually enjoyable to use, with themes, plugins, and time-saving features that'll make you wonder how you ever lived without them.
In this guide, I'll walk you through my personal setup process, from installing the necessary tools to customizing everything just right. By the end, you'll have a terminal that not only looks gorgeous but actively helps you code faster and more efficiently.
If you don't feel like reading, check out my youtube video. With just 15 minutes video, you could save over 50 minutes every day.
Let's dive in!
Step 1: Install Homebrew – The Developer's App Store#
First things first, we need Homebrew - the missing package manager for macOS. If you're already familiar with Homebrew, feel free to skip ahead, but for everyone else, here's how to get started:
- Copy the following command, paste it in your terminal and hit enter
1/bin/bash -c "$(curl -fsSL https://raw.githubusercontent.com/Homebrew/install/HEAD/install.sh)"
- You might be prompted for your password - that's normal. After entering the password it should complete the download
- Verify installation by checking the version:
1brew --version
- If you see a version number, you're good to go!
Step 2: Install Warp Terminal#
Now for the fun part - let's get Warp set up:
- Use warp.dev to download the Warp Terminal app.
- Launch Warp. The first time you open it, you might get a security prompt - just follow the on-screen instructions.
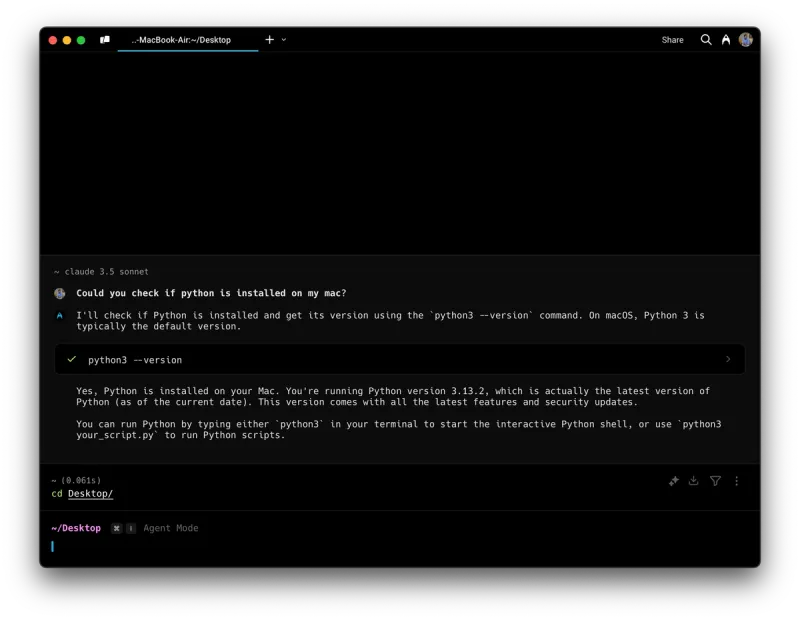
- Take a moment to familiarize yourself with the interface - notice how it already looks cleaner and more modern than the standard Terminal app? That's just the beginning.
- You can use natural language in this terminal and let AI run the commands
Step 3: Install Oh My Zsh – Supercharge Your Terminal#
With Warp running, let's add Oh My Zsh to take things to the next level:
NOTE: Even if you don't have warp, this setup is helpful, so you can skip the warp installation and still have the best terminal setup from the following.
- Navigate to Oh my ZSH to install or use the following command to downlaod
1sh -c "$(curl -fsSL https://raw.githubusercontent.com/ohmyzsh/ohmyzsh/master/tools/install.sh)"
- Oh My Zsh will get installed itself and change your terminal's appearance immediately.Explore the .zshrc file - this is where all the customization happens:
1open ~/.zshrc
- Take a few minutes to browse through this file. Don't worry if it looks intimidating at first - we'll focus on adding plugins and powerlevel10k theme.
Step 4: Add Auto-Suggestions and Syntax Highlighting#
These two plugins will make your terminal experience 10x better - I promise:
- Install Auto-Suggestions (this gives you predictive text based on your command history):
1git clone https://github.com/zsh-users/zsh-autosuggestions ${ZSH_CUSTOM:-~/.oh-my-zsh/custom}/plugins/zsh-autosuggestions
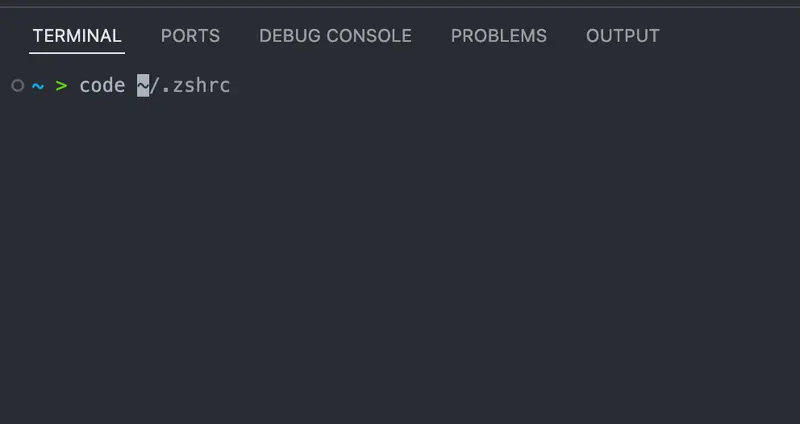
- As you can see in the following image, I wrote upto code and it is suggesting based on my command history. I can click on either tab or right arrow key to complete the command.
- Install Syntax Highlighting (adds color coding to your commands):
1git clone https://github.com/zsh-users/zsh-syntax-highlighting.git ${ZSH_CUSTOM:-~/.oh-my-zsh/custom}/plugins/zsh-syntax-highlighting
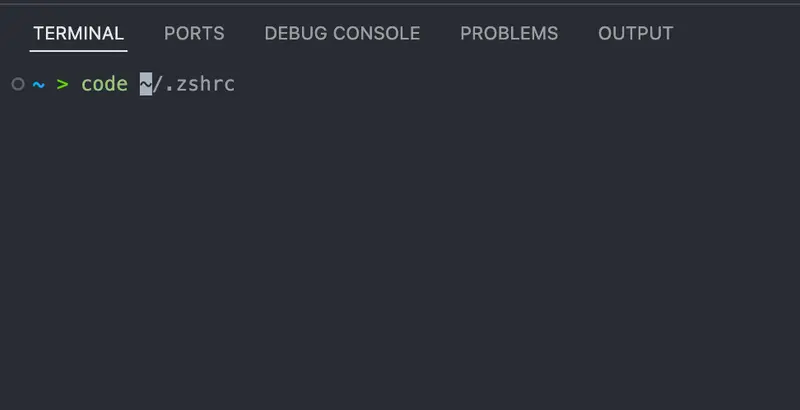
- In the above image where we don't have syntax highlighting but after enabling it you can observe in following image that code is in green colour
- And if we use command that does not exist
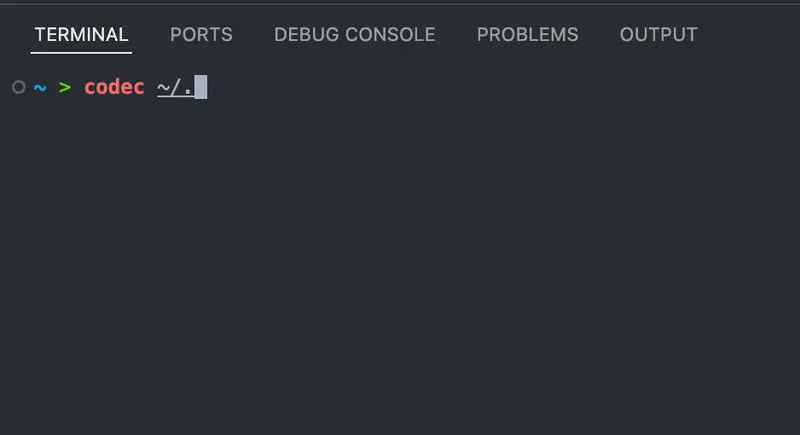
- Since codec is invalid, it turned into red.
- But to make these work we need to enable Both Plugins by opening your .zshrc file and finding the plugins= line. Update it to include our new plugins: Don't forget to save the file! It should look something like
1plugins=(
2zsh-autosuggestions
3zsh-syntax-highlighting
4)
- And to apply the changes, you need to either restart Terminal or run the following command
1source ~/.zshrc
Step 5: Install and Configure Powerlevel10k Theme#
Last but definitely not least, let's make your terminal look incredible with my favorite theme:
- Clone the Powerlevel10k repository:
1git clone --depth=1 https://github.com/romkatv/powerlevel10k.git "${ZSH_CUSTOM:-$HOME/.oh-my-zsh/custom}/themes/powerlevel10k"
- Activate the theme by editing your .zshrc file and changing the ZSH_THEME line to:
1ZSH_THEME="powerlevel10k/powerlevel10k"
- Restart Terminal or run source ~/.zshrc again.
- Follow the configuration wizard that automatically appears. This is where you get to customize how everything looks! feel free to choose whatever speaks to you. The wizard will ask about symbols, colors, and layout preferences. Don't stress too much - you can always reconfigure it later by running p10k configure.
Troubleshooting Common Issues#
After setting this up dozens of times (on my machine and helping friends), here are the most common hiccups people run into:
- Command not found errors? Double-check that your Homebrew path is correctly set in your .zprofile and .zshrc files.
- Theme not displaying properly? You probably need to install the recommended fonts. Run p10k configure and follow the font installation instructions, or download them directly from the Powerlevel10k repository.
- Plugins not working? Verify that your plugins list in .zshrc is formatted correctly - no commas, just spaces between plugin names. Also, make sure the paths to your custom plugins are correct.
Going Further: Advanced Customizations#
Now that you have the basics set up, here are some ways I've taken my terminal setup to the next level over time:
- Create custom aliases for your most-used commands. For example, I have alias gp='git push' in my .zshrc to save a few keystrokes every time I push code.
- Explore additional plugins - my personal favorites include: Just add them to your plugins list in .zshrc!
- git-flow for better Git workflow management
- docker for Docker command completion
- web-search to search Google right from your terminal
- aliases to save ton of time executing commands
- Set up custom key bindings for operations you perform frequently. I've mapped Ctrl+R to a fuzzy history search that's saved me hours over time.
Conclusion#
You've now transformed your standard terminal into a productivity powerhouse!
I've been using this exact setup for over two years now, and it's dramatically improved my workflow. The time savings from auto-suggestions alone have been worth the setup, not to mention the mental bandwidth saved by having syntax highlighting catch my typos before I run commands.
What customizations are you most excited about? Have you discovered any plugins or themes I should know about? Drop a comment on my youtube video - I'm always looking to improve my setup further!
Happy coding! 🚀

